WS&S

Wargames, Soldiers & Strategy

Thursday, September 29, 2016

Opening a window on history.

After another stimulating chat with my buddy Kurtus, during the none recorded part of last night's paint and chat on Tabletop Commanders. We got to discussing the whys and wherefores of wargaming, in particular what it means to us and why we enjoy it so much, what do we actually get out of it, both of us being mainly solo gamers.

I personally am proud to say I never really grew up, still a little boy at heart. I can still recall the pleasure and excitement of playing with those ubiquitous Airfix 1/72nd scale armies on my Mum's kitchen table, books for hills and pencils for fences. I was down there on the table with the little fellows, urging the boys on to heroic deeds.


Coming back to the hobby after half a century, I still feel that thrill as I lay the troops out on the table in anticipation of the coming battle, a lot older, but seemingly only a little wiser, I am once again down there on the playing surface with the troops I have so carefully painted to the best of my ability.


Only now of course, a lot more research and attention to detail occurs before any of the metal and plastic warriors form up to face the foe. Being a strictly historical gamer, I have, in many cases, a true OOB to work with, or at least a best estimate, by scholars far cleverer than me, to assist in the purchase and collection of armies.


But it still comes down to the thrill of recreating a piece of history, be it a real or fictitious battle of the period. Both can be just as entertaining and instructive about the period we are attempting to recreate. Of course we are at the whim of the dice gods, constraints of the rules system, but that just adds to the uncertainty of what will happen on the tabletop.


I play solo mostly, and become so engrossed with what is happening on the table before me, I am still down there, urging the boys on amid the crackle of muskets and the roar of cannon, spurring on my horse as we crash into the men at arms before us. Attempting to rally and encourage wavering or routing units.


At the end of the turn, it is time to walk around the table and don the helmet of the opposing general, and try to extricate the army from the predicament that I have put it in during the previous bound. Playing solo, I can break off for a coffee or a sip of ale whilst I ponder the next move, will I have enough command points to both shore up my weakening left flank and advance on the right?


I am now retired, so have more time to spend on the hobby, a pastime so stimulating that it keeps the old grey matter active, the eyes focused on my brushwork and a constant thirst for knowledge. Add to that the thrill of being down there in the midst of the battle with the boys. Have I grown up? No I haven't, nor do I want to.


The alternative is of course daytime television! Need I say anymore?

The Battle of Antietam 1862 - Part One

Following on from my post of a few days ago, the research has been done and the table laid out for Phase One of the battle.

Prologue

The hapless Union General Pope commanding the Army of Virginia, was swooped upon and beaten by General Lee at Second Bull Run/Manassas. General McClellan had been ordered to assist Pope by combining their forces, but as usual, the Little Napoleon dithered and so was not on hand to assist.
Lincoln removed Pope from his command and was forced to place the two combined armies, now the Army of the Potomac under the command of George McClellan.

By this time Lee with his army was across the Potomac in Maryland at Frederick, he expected McClellan to move with his usual indecisiveness and so took the opportunity to send half his army to capture Harper's Ferry to the West. Lee took the rest of his army behind the Blue Ridge mountains, leaving units to cover the passes. However, McClellan had a received a huge stroke of luck, Lee's plans, wrapped around  some cigars had been found by a Union soldier and so Little Mac knew exactly what Lee was doing.

With unaccustomed speed the Army of the Potomac forced its way through the lightly guarded passes, causing Lee to call his split army back together again behind Antietam Creek near Sharpsburg. Although outnumbered, Lee was not unduly worried and expected McClellan to waste time and so allow the split Confederate army to reunite. He would not be disappointed.

At dawn on 17th September 1862, 80,000 Union troops faced 40,000 Confederates across Antietam Creek. Had McClellan used his superior numbers in an all out attack, it would no doubt have seen Lee and his rebel army streaming back through Sharpsburg in full retreat. But McClellan attacked in three phases, convenient for me with my small table as I can relay the terrain for each phase of the battle, So please grab a coffee and read my interpretation of the battle.


Looking along the table from North to South. The main features consist of the North Wood at the bottom of the photo, the East and West Woods in the centre left and far right respectively. The Hagerstown Turnpike snakes it way from North to South. Centre left, is a fenced wheat field, it slopes down to the North. In the distance on a small plateau sits the Dunker Church. 


The table from the East.


The Dunker Church can be seen on its flat plateau, with the West Wood beyond.


The wheatfield slopes down to the North, this is the view of the advancing Union troops.


General Joe Hooker, commanding First Corps surveys the field from North Wood. McClelland has given him the job of rolling up the Confederate positions.


On the Union right flank are the four brigades of 1st Divison, each with an attached artillery battery under the command of Doubleday.


In the centre is 2nd Division under the command of Ricketts, He has three brigades, each with supporting artillery.


Finally, on the left flank commanded by Meade, is 3rd Division, again of three brigades and three batteries of artillery.


Facing the Union troops is Jackson's Corps. On the left flank by the West Wood is Ewell's Division commanded now by Lawton with four brigades and three batteries.


The right wing consists of Jackson's Division, currently commanded by Jones, with four brigades and five batteries of artillery.


Looking North from the Confederate positions.


Not on the table are artillery batteries for both sides, to the West artillery batteries can fire into the flank of any advancing Union troops. To the East, are Union guns which can only be used for counter-battery fire.

Joe Hooker has the choice during the battle to call for reinforcements from Twelfth Corps commanded by Mansfield and Second Corps under Sumner. However, if either of these corps are committed in phase one, they can, if they survive in a fighting condition, only come onto the table as reinforcements for phase two. Whilst the rebels can call on at anytime, Hood's Division of Longstreet's Corps, consisting of two brigades and three artillery batteries.

Please join me for Part Two when the action begins.


Tuesday, September 27, 2016

TtC WINTER-WARMER Challenge!

Well folks, here we are with the Winter season upon us. Another great year of wargaming, PAINT & CHATS, and painting projects.

As the year comes to a close, we are introducing our TtC community painting/project challenge: "Winter-Warmer!". Yup, the "Winter-Warmer" will hopefully become a regular community event in the coming years. A great way to finish off past projects! Of course, with all the other challenges being put forth this time of year by other communities, why not join in and have our very own community-based challenge as well?!

Starting OCTOBER 1 and running through December 31, 2016!

So, what is it all about then, and how do you take part? Easy! The event will start October 1, running through December 31 of this year. Short notice? Perhaps. Here is what you need to know in order to take part.

  • Come up with a project(s) that will carry you through the next three months. Be practical here. A good start are past projects you would like to get done by year's end.
  • Projects can be terrain, painting miniatures, or a mix of the two.
  • Projects can be for ANY period or genre of miniatures wargaming: Napoleonics, Sudan, 40k, D&D terrain/miniatures, etc., etc.
  • Once you have a project in mind, tell the community about it. You can do this on the G+ TtC community, or the FaceBook TtC forum. Just make your post stating what you want to get done.
  • The community WILL BE WATCHING! Be sure to post regular updates in the G+ and/or FB communities showing your progress so far. Include pics! :)
  • Be sure to check everyone's projects as well and leave some feedback!
  • Take advantage of the PAINT & CHATS held within the community to follow along everyones progress, as well as to JOIN IN and get stuff done with us. It's all great fun :)

That's about it really. There are no prizes except getting your projects done and on the table! What better reward is that?!

Everyone is welcome to take part in the challenge. Just be sure to let everyone know you ARE taking part. Stick with it too! :()

So that's about it. Are you guys ready? I know I am. I have a NEW project planned actually and will be using this challenge to get it done. Oh boy! This will be good.

Any comments, or feedback is welcome. Good luck everyone... and see you all in the PAINT & CHATS! :)

~K


Sunday, September 25, 2016

Adventures in 3-D Printing for Miniature Gaming

Adventures in 3-D Printing for Miniature Gaming 
Modern combat 3D printing project
Eastern Ukraine

Time to talk about my major project I have started with my 3D printer and how this project came about. 
It all started with me finding a box full of 20mm modern US and British vehicles/tanks Team Yankee had just come out with a few months prior. I was loving seeing all the pics and vids of the tanks etc.
   I was thinking I really shouldn't start a new project as I've been doing an awesome job sticking to my projects I chose at New Years lol .
 Playing some modern games was just too much to resist, so I decided I was going to jump in and start playing some modern, but first thing I had to decide was scale . I had so much modern 20mm, I decided playing it in 20mm would be better and less money to lay out at first . 
I then started pricing out Russian 20mm tanks to fight the NATO forces I had. I then realized OMG this was going to be pricey. At this point, I had my printer for about a week and a light bulb went off. I thought, " Hell I can print tanks, APCs and IFVs.".
 At this point I challenged myself to try and print 80% or more of the models I needed to play.  I had to pick a set of rules to play after searching the net and while reading reviews I decided on Sabre Squadron company to battalion level combat .
The next thing was to decide on the setting. I decided to set my games in Eastern Ukraine. That allows me to print and collect a ton of Russian Soviet block vehicles to fight my NATO forces later for cold war gone hot games .
 So for the  last  two months I have been printing like crazy. Printing T-72 tanks, BTR-60, APCs, BMP-1,  BMP-2, IFV, and armoured cars ,trucks,etc. The only items I have not printed have been the infantry . I now have printed enough BTR-60 and BMP-1 to have a company of each and 4x platoons of different types of T-72 tanks in support . I have started to add trucks, armoured cars, and engineering vehicles.
Now to add more flavour to my games!


Planning a table top battle - Antietam

Back in March of this year, I fought the First Battle of Bull Run/Manassas on a 6 x 4 feet table, I photographed and did a running commentary over a number of posts, These can be found on my blog.

http://thediomedef16.blogspot.co.uk/

I am currently in the early stages of fighting another major battle, this time the aim is Antietam, so I thought some may find it interesting on how I go about the research and actually recreating a real historical battlefield on a table.

On this occasion I found a marvelous article in issue 253 of Wargames Illustrated from November 2008, the author, R. Neil Smith has done the hard work and created simple maps of the battlefield as well as the OOB of the forces involved.

Due to the piecemeal way the Union attack went in, it is possible to fight the battle in three distinct phases, allowing the table to be reconfigured for each phase of the battle. Events that happen in a previous phase, can and will, affect what happens in the following phase.


Taken from the magazine, the text is not too clear, but the maps are fine.


These maps and OOB will form the basis of my re-fight on the table top. I will be using a base to represent a brigade, this will stop my small table from becoming too congested. I normally try to represent each regiment of each brigade, that would be doable on a 6 x 4 feet board but not on a 43 x 28 inches table I currently have to use. But hey, who said big battles cannot be fought on small tables?

As in the earlier battle, mentioned above, I will photograph and write a commentary of events unfolding on the tabletop, and just like last time, extracts of letters and dispatches will also be included. So watch out, your name may appear as a Johnny Reb or a Billy Yank, writing down his experiences of the battle.


Tuesday, September 20, 2016

The Battle of Wilson's Creek - 1861 (Part Three)

Turn Thirteen
Union initiative, with his anvil in trouble the commander attempts to advance the hammer. A roll of 2+1, only allows three regiments to advance.


He moves all three regiments in the centre.


The rebel commander once again takes a chance, and attempts to activate two brigades, one in the main assault and the other facing the anvil. He can only move a total of three regiments.


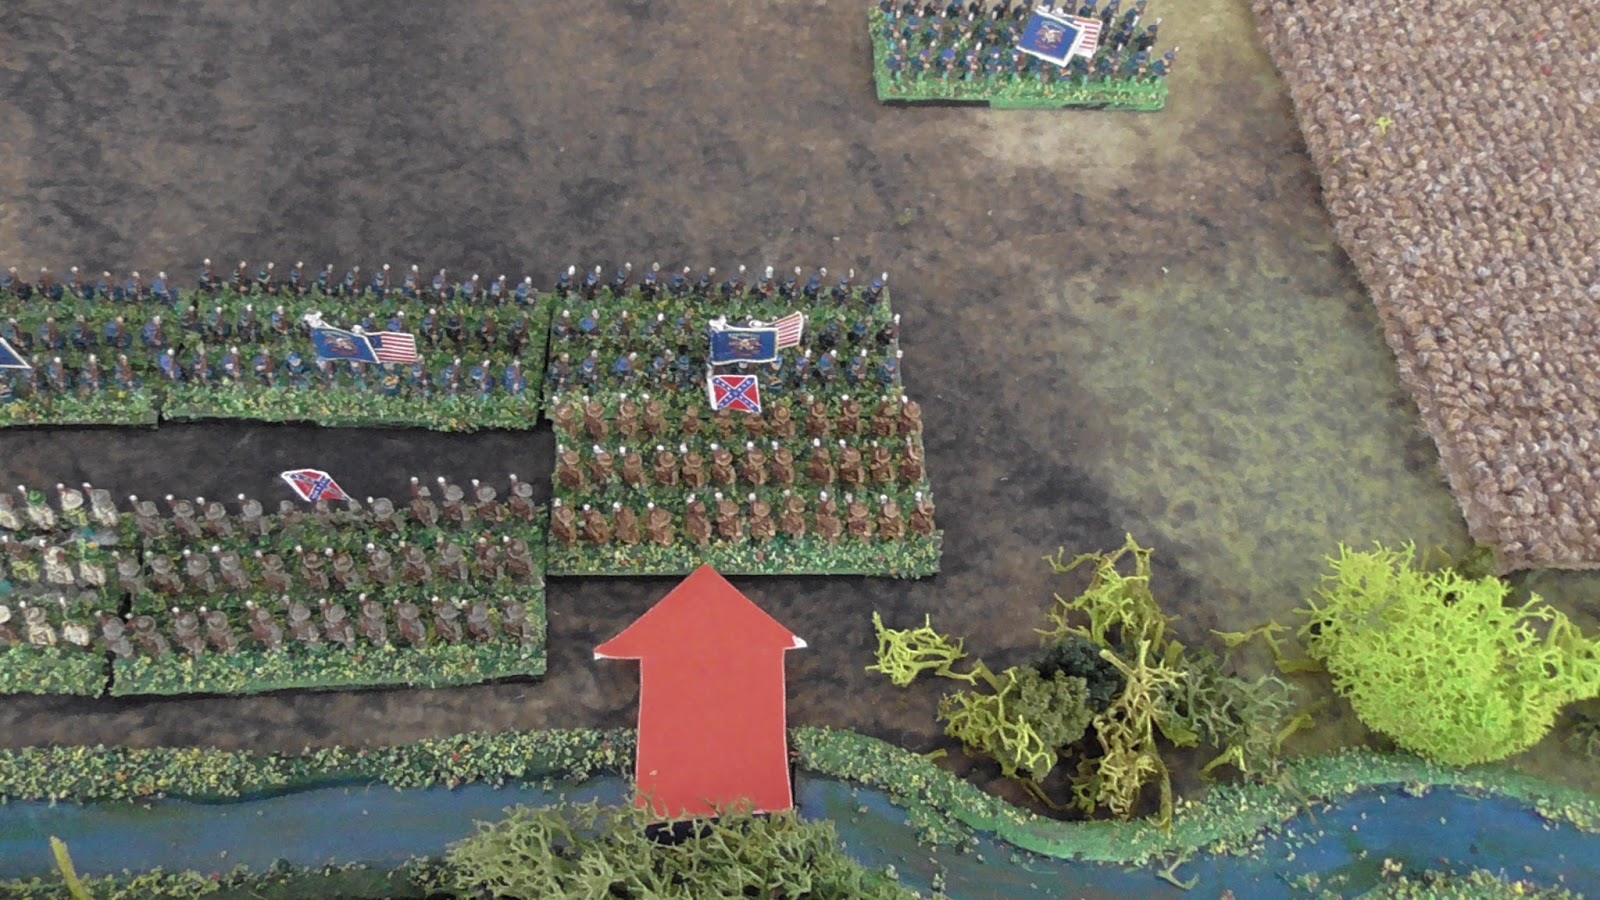
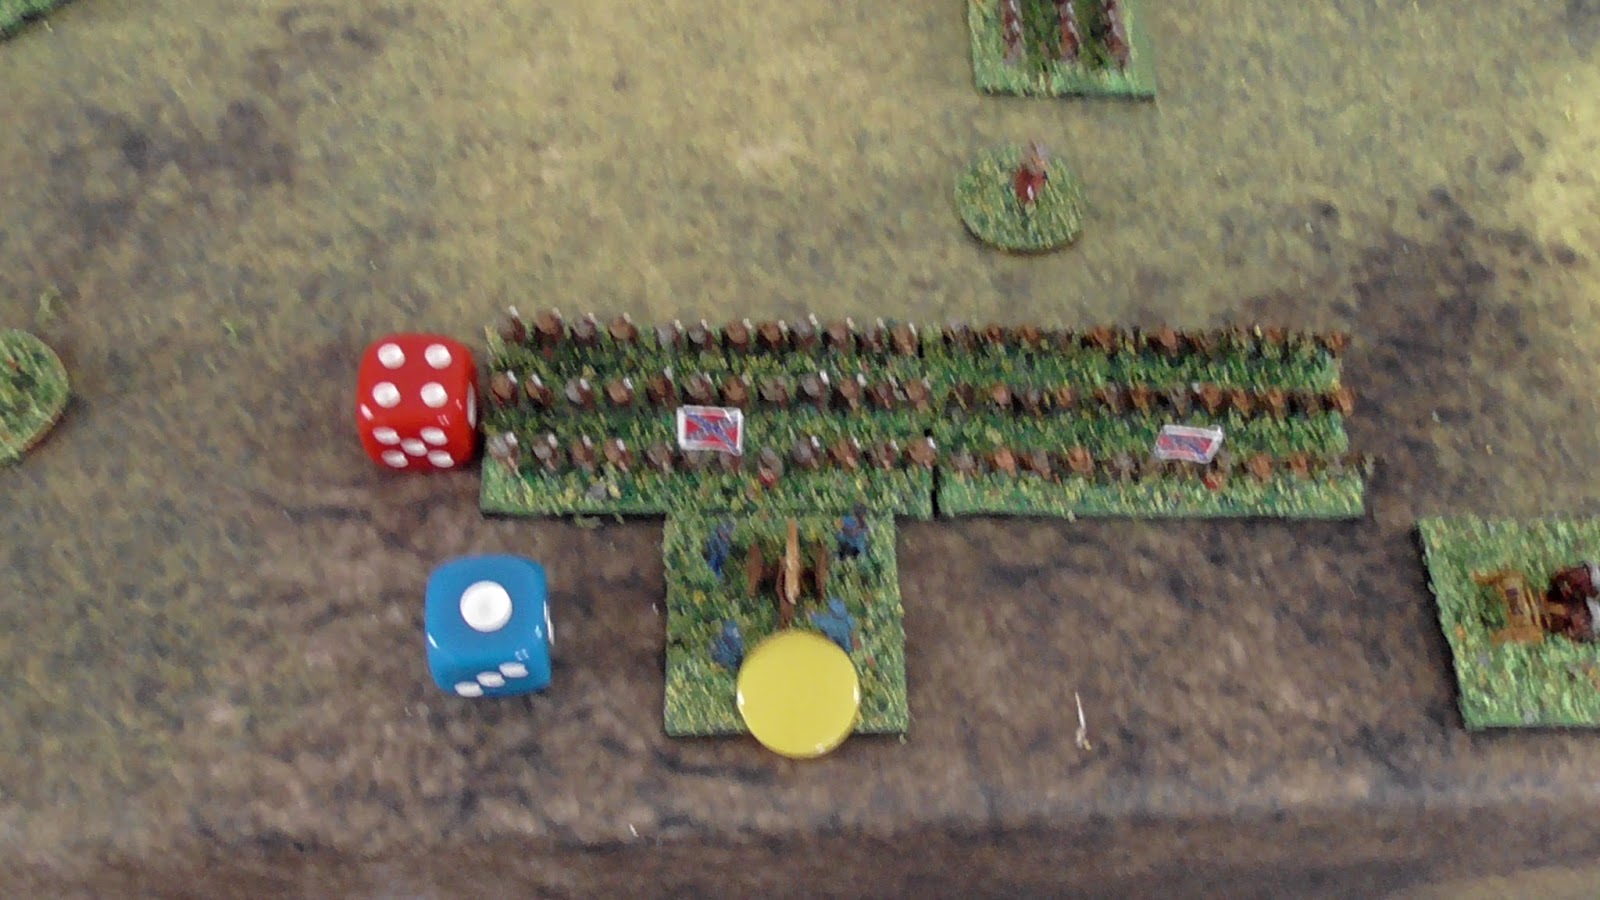
With the whoops of the Rebel Yell filling the air, the two activated regiments crash into the dismounted troopers and the artillery battery.


In the main attack a single reb regiment also charges forward into hand to hand combat.


Rebel batteries fire into the anvil, this one fails to hit.


However, the second does hit and pushes back a Union regiment in a shaken state.


The Union forces of the anvil are being forced dangerously close to the table edge.


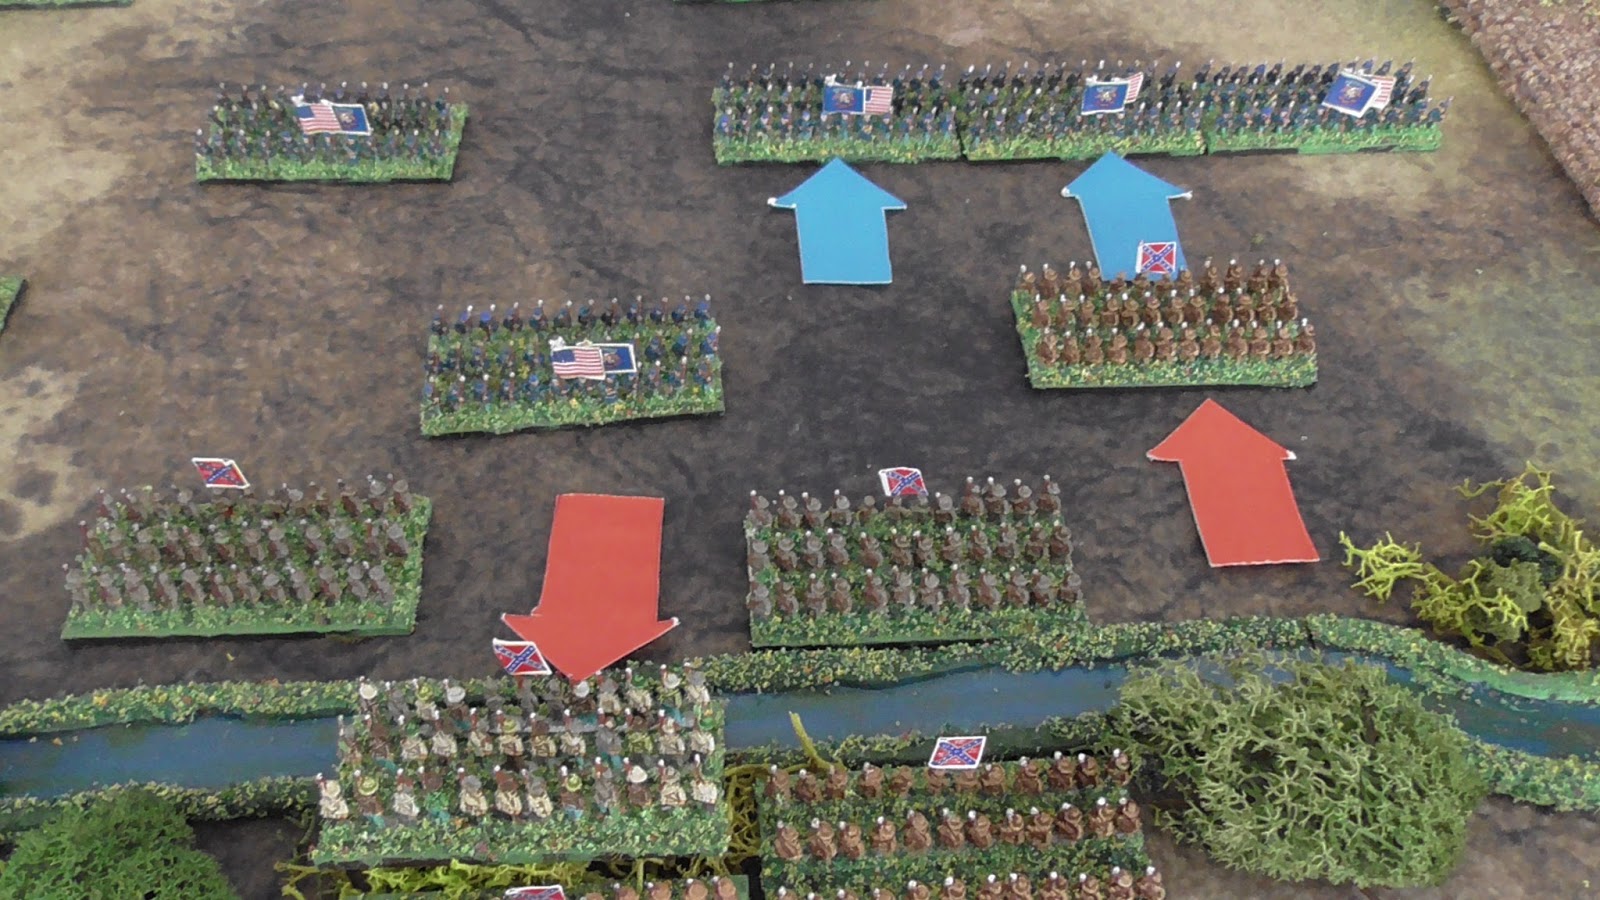
Mixed fortunes in the main attack.


Two Union and a single reb unit being pushed back.


Back at the anvil, the bitter hand to hand fighting is decided. The initial dice rolls.


The artillery adds a +2 for facing an attack from the front.


Both rebel infantry gain a +1 for the Rebel Yell and so both win the combat by one.


As the difference is just one, both Union units fall back and are shaken, whilst the victorious Confederate regiments advance a further 4 cm. It appears the Anvil is being hammered! (Pun intended) None of the shaken units will be able to remove their markers, as the enemy are within 8 cm. If hit a second time with the shaken marker still in place, the unit is destroyed!


Turn Fourteen
Confederate initiative, the commander wants to keep up the attacks on the salient, but also wants to hold off the Union 3rd Brigade, so takes a chance on activating two brigades, he rolls a 3+1.


Split equally between the two brigades, the rebel yell rings out again and the forces collide.


In the main attack, he moves just a single regiment up from the stream to form a solid battle line to face the oncoming Yankees.


The Union commander too attempts to activate two brigades, the hammer and the anvil.


A roll of 6+1 is just what he needed.


Aware his troops are sitting ducks for the reb artillery, he attempts to break out from the salient using three regiments.


He uses the remainder to launch an all out assault on the rebels in front of the creek.


Original rolls at the salient.


With modifiers.


The union cavalry troopers are swept away, but canister fire drives back one rebel regiment.


The main Union attack goes in, three against one. Original rolls.


Modified.


The confederate regiment is pushed back.


Back at the salient, one rebel battery open fires on a Union infantry regiment that is already shaken.
The roll of a five spells doom.


The Union regiment is routed from the field.


The other battery too, scores a hit.


Forcing the regiment to retreat and reducing them to shaken.


In the firefight, muskets rattle out their macabre tune.


Honours are roughly even, with both side pulling back to regroup.


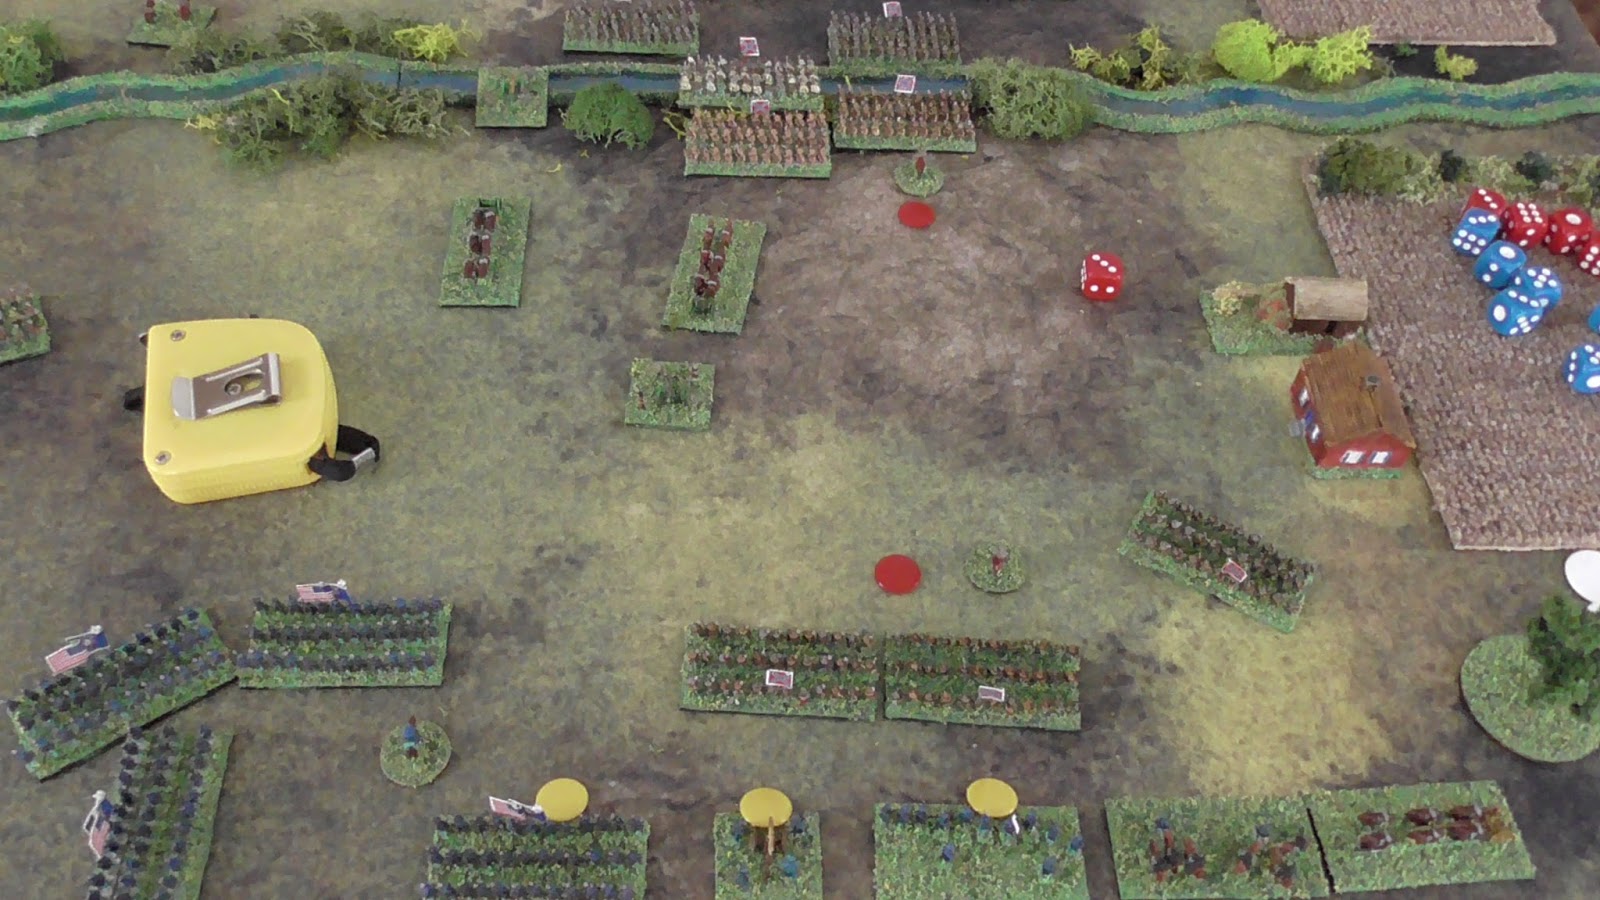
The dead pile, The Union will break on losing one third of their units rounded up. so twenty gives a break point of seven.


Turn Fifteen.
Confederate initiative. Two brigades are activated and with a a roll of 3+1 two regiments in each brigade can be activated.


At the salient two infantry regiments charge the guns.


Whilst two regiments push forward to reform the battle line.


The Union commander realising his plan is falling apart, attempts to get his troops moving and activates two divisions, A good roll of 5+1.


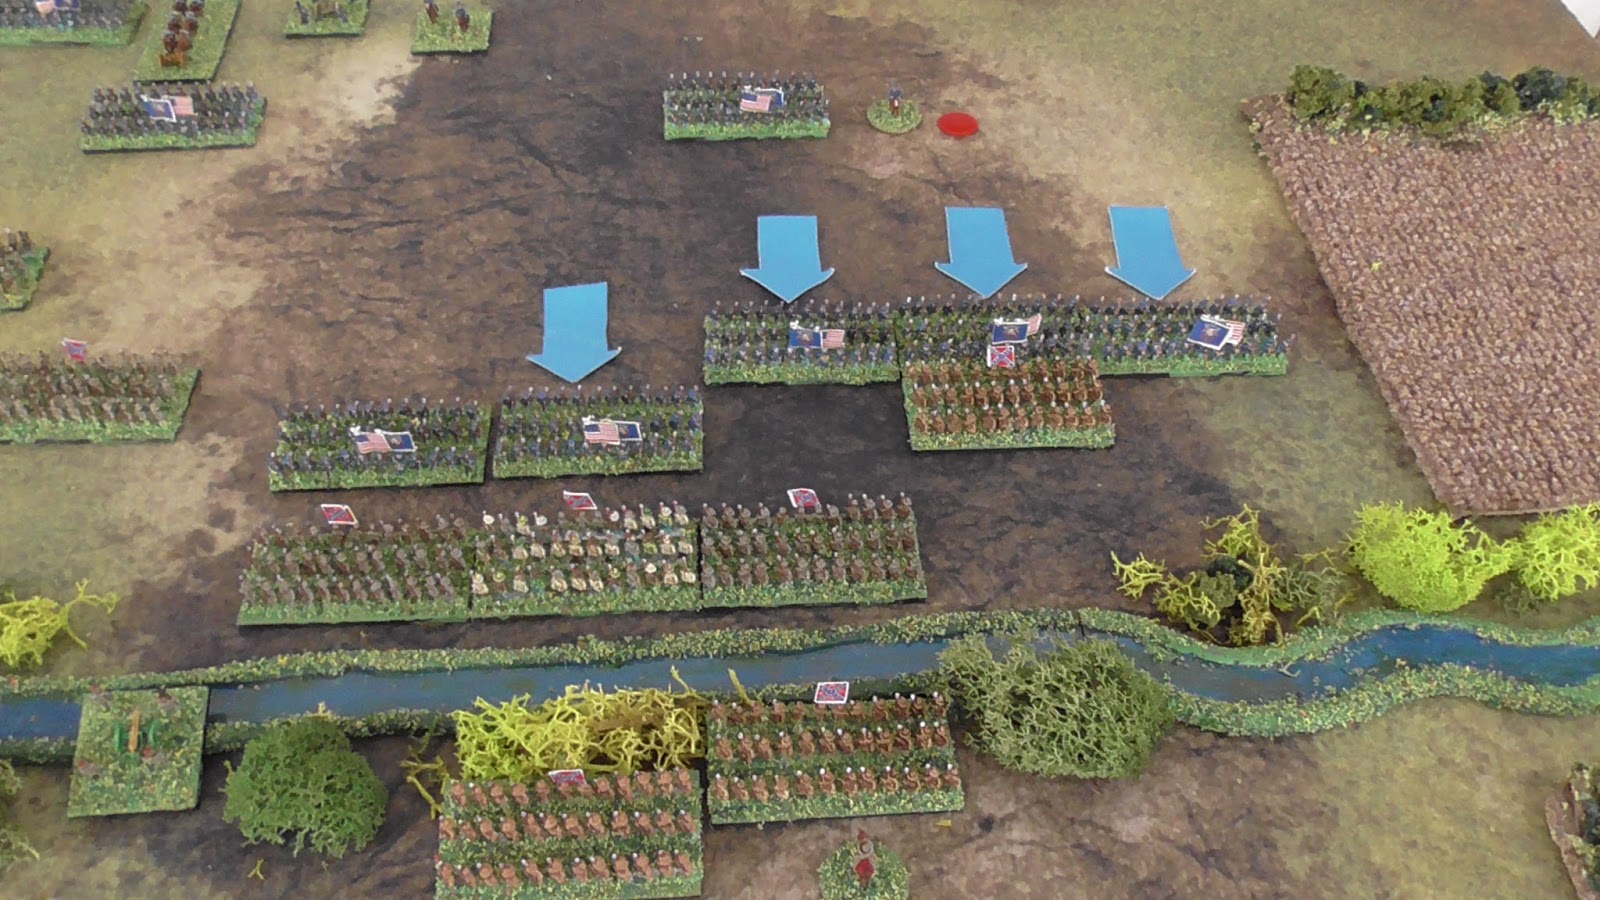
He uses half the pips to charge his 3rd Brigade into the enemy, in a desperate attempt to break through to his beleaguered anvil. 


He also advances on his right flank to keep the enemy busy.


3rd Brigade smash into the rebel line, unmodified dice roll.


Modified score.


The Southerners not only halt the Yankees in their tracks but throw them back shaken.


On the Union right a firefight ensues.


The Union artillery has no effect, and the infantry firefight fails to produce any results.


The two forces eye each other over their muskets.


With the failure of the main attack to break through, attention turns to the rapidly dwindling 4th Brigade in its equally fragmenting salient. Unmodified roll.


With modifiers added.


The artillery battery is destroyed. Over run by two infantry regiments.


The remainder of the salient erupts in a firefight.


The rolls. devastating for the Union.


One infantry unit pushed back and a second destroyed by artillery.


The anvil is now reduced to two regiments of infantry, who realise they are now surrounded, with little hope of relief. To prevent further bloodshed and pointless waste of life, the Union brigade commander orders his men to lay down their arms.


The dead pile now numbers four units, add to this two surrendered and the Union is one away from defeat.


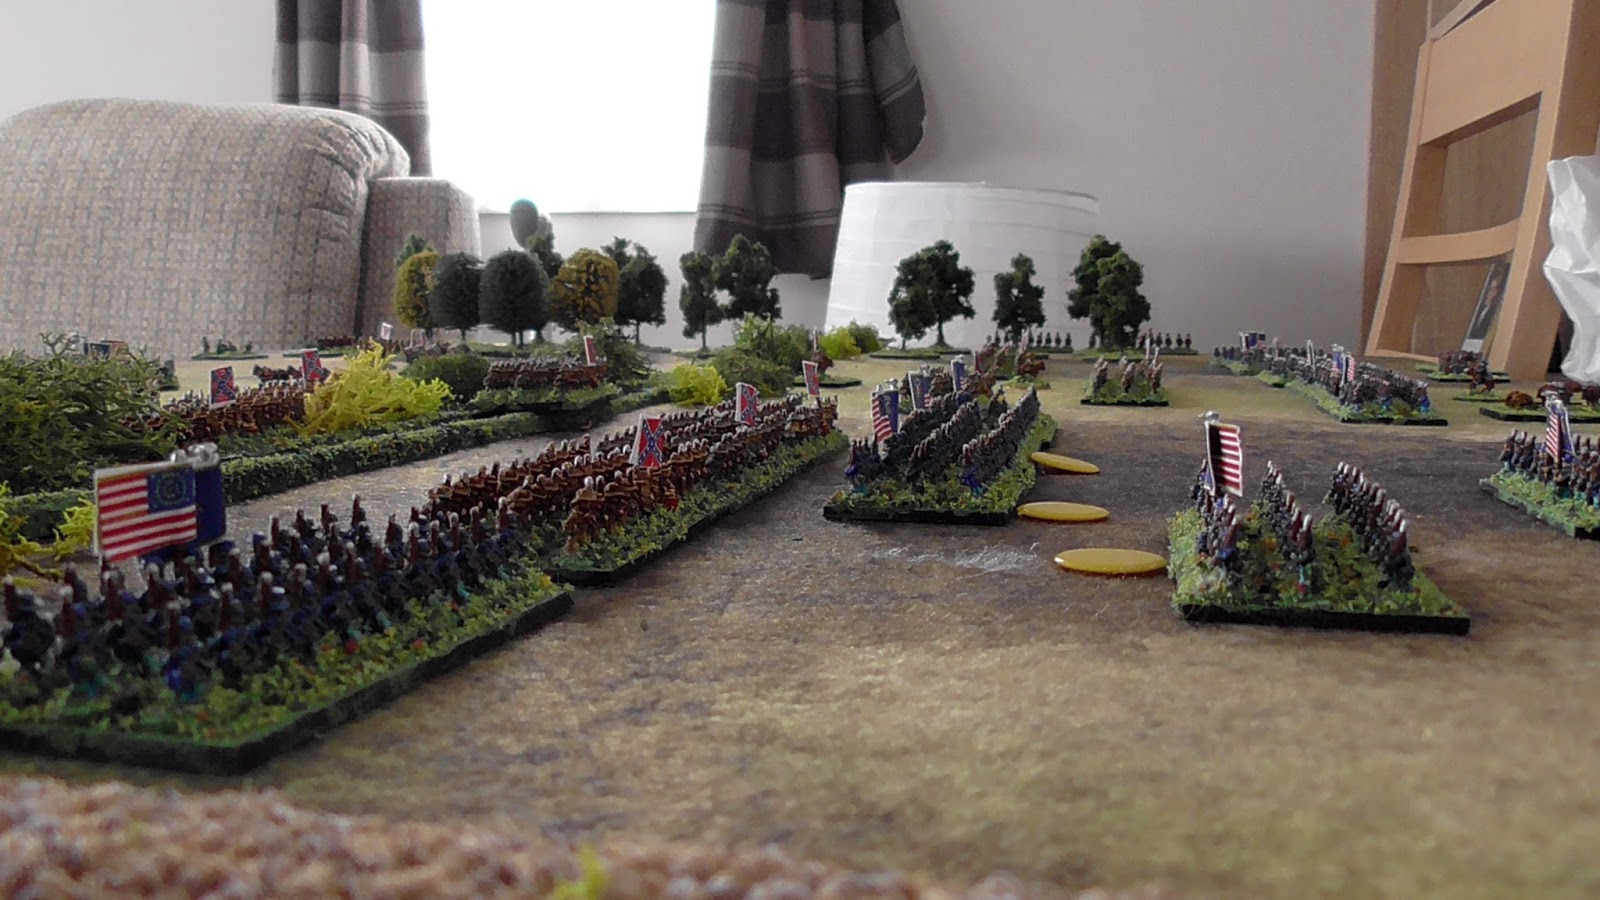
Intermixed flags in evidence on the field.


The remains of 4th Brigade lay down their weapons in surrender.


Union 3rd brigade (the hammer) fall back and are too close to the enemy to remove shaken markers.


Brigadier General Lyon seeing his plans in tatters, orders a general retreat of his army.

So the battle ends there. I could have carried on for one, even possibly two more turns, but I think the result was inevitable, Had the two surrounded regiments of 4th Brigade carried on the fight they would have been destroyed by far greater numbers. The 3rd Brigade, with three regiments shaken and little chance of removing the markers, would have lost at least one in the following turn(s), to take the Union army to or beyond its breaking point of seven.

All in all, a very enjoyable solo battle. Robert Lloyd's rules work really well, though I had rather more elements on the field than he planned for, but it shows his rule set can easily be scaled up for the larger battles, and still show individual regiments.

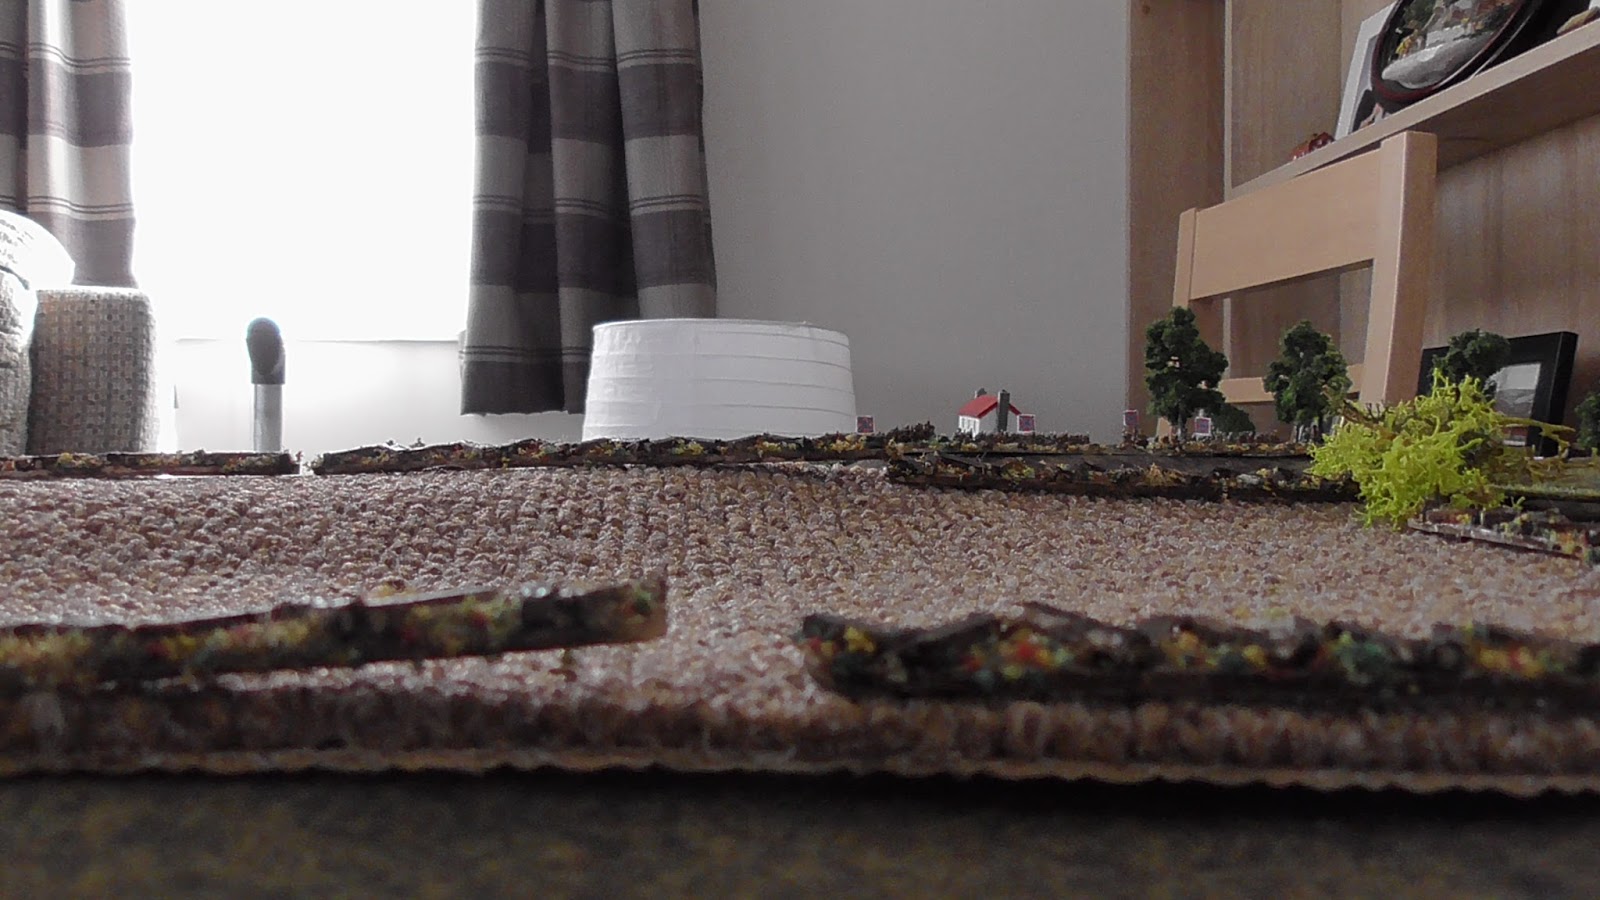
I could have managed without any markers on the field, save perhaps the shaken markers, I used them for the purposes of the blog post, in an attempt to show what was happening to anyone interested enough to read it. I also think the arrows help, and I must admit, some of the photos look like a page from an actual battle book.